A
blog can be a great way to connect with friends, family and other
bloggers. With the dawn of user-friendly content management systems, you
no longer have to be a computer expert to create a blog. Additionally,
many content management systems offer free programs for bloggers. In
other words, getting your writing, opinions or artwork out there is easy
and free. One popular and particularly reliable free blog system is blogger.com. It allows you to create a blog, make pages quickly and easily, and control privacy settings and visitor comments.
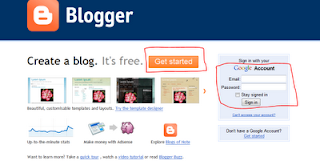
Step 1 : Go to www.blogger.com
step 2 : Sign In using your gmail account. If you have not yet created then click on 'Get Started' as (shown below)
.
step 3 : Lets assume you signed in using your Gmail Account. Once you login you will get the following screen. Choose a display name which will display on all your posts. Select the appropriate Gender from the drop down menu. Select the check box for Terms of Service and click Continue. (shown below)
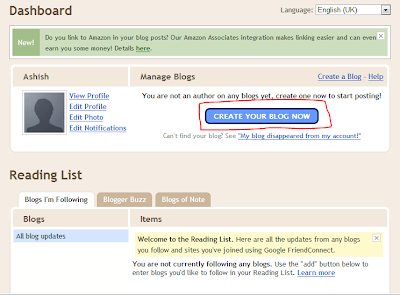
Step 4 : Click on 'Create Your Blog Now' link as shown below.
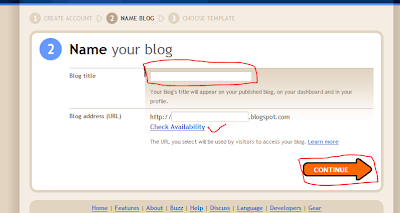
Step 5: In the next Step you have to choose a Title for your Blog and the Blog Address. The Address you choose may or may not be available. Click check availability link and you will either see 'This Blog Address is available' or 'Sorry! This Blog Address is not available'. Try a different one until you get a message 'This blog address is available'. Then click Continue as shown below.
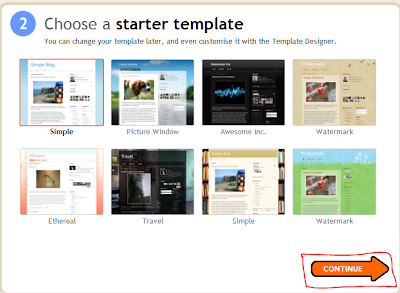
Step 6 : Next step is to choose a template. Select whichever you like. You may change your template anytime afterward. So, don't worry about the templates now and just select anyone of them and click Continue as shown below.
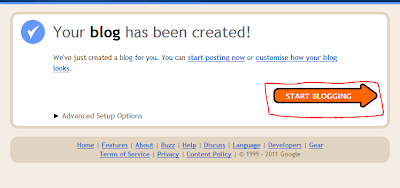
Step 7 : That's it! Your blog is created now. Click 'Start Blogging' as shown below.
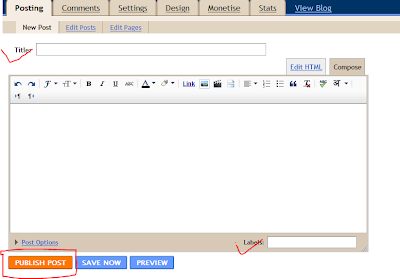
Step 8 : You will be redirected to Posting page where you can create your first post. Write a nice and a relevant title for your post. Write your content whatever you want to write. At bottom right you can add Labels to your post. Labels are the keywords which describe your blog. So, add the relevant labels. Then click button 'Publish Post' as shown below.
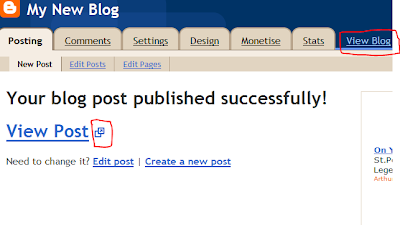
Step 9 : You will then get the following screen. here you can view your post, create a new post or edit the post you have just posted. Otherwise click on the link 'Dashboard' at the top right side.
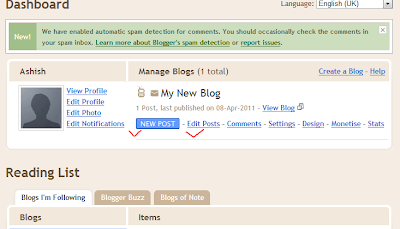
Step 10 :You will get the following screen now. Here you can manage all your posts, customize your blog, edit your profile and account.
Congrats! You have now created your first blog.


No comments:
Post a Comment